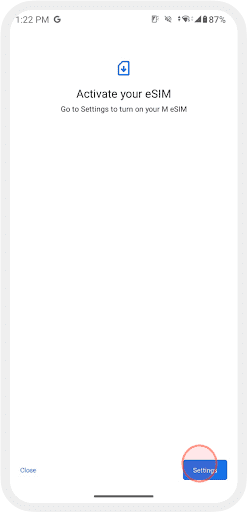
eSIMの設定
Japan Wireless eSIM IOS & Android 設定ガイド
これらの簡単な手順に従って、iPhoneまたはAndroidでJapan Wireless eSIMを設定する方法を学びましょう。デバイスがeSIMと互換性があることを確認し、QRコードをスキャンして数分でプランをアクティブにします。 物理的なSIMカードを必要とせずに、ローカルのモバイル接続を楽しみましょう。
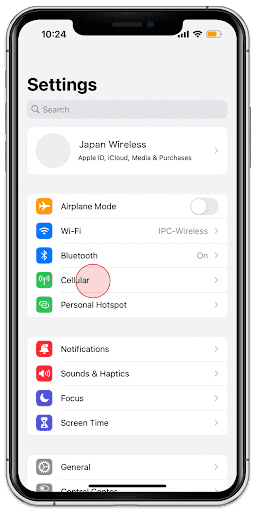
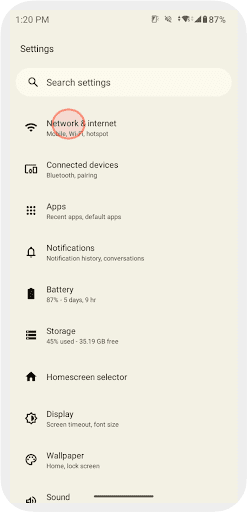
1.
Go to [Settings] and tap [Cellular]
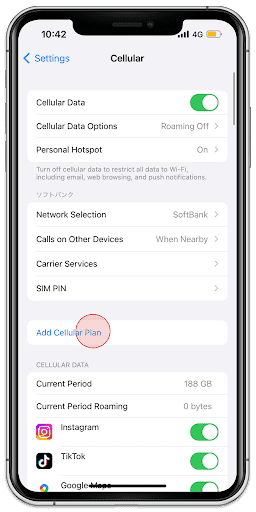
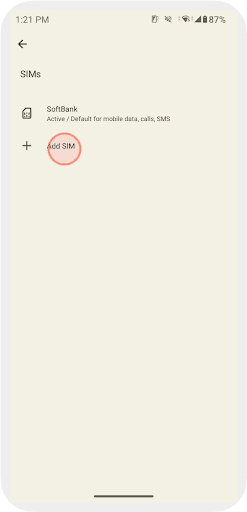
2.
Tap [Add Cellular Plan]
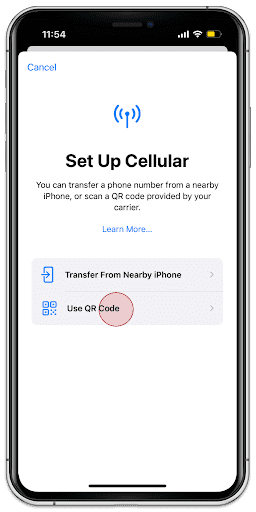
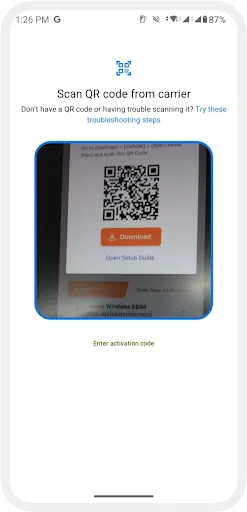
3.
Tap [Use QR Code]
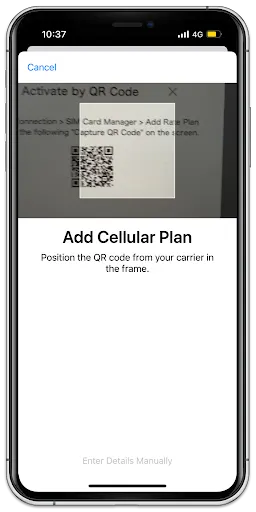
4.
Scan your QR Code of your order
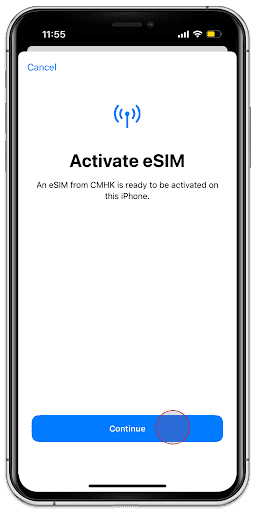
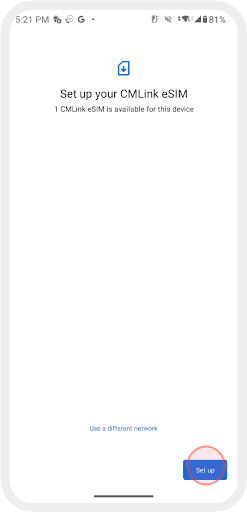
5.
Tap [Continue]
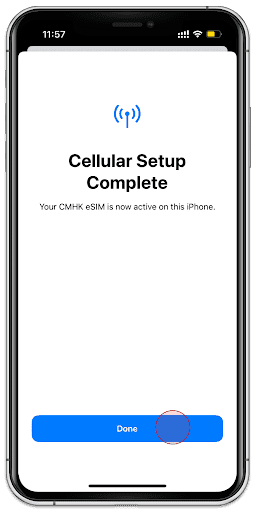
6.
Tap [Done]
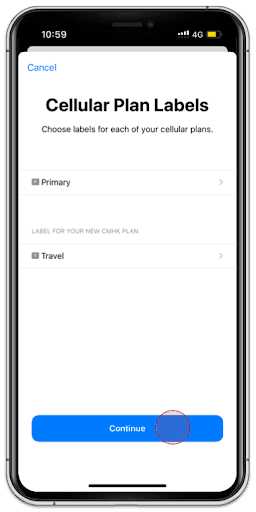
7.
Tap [Continue]
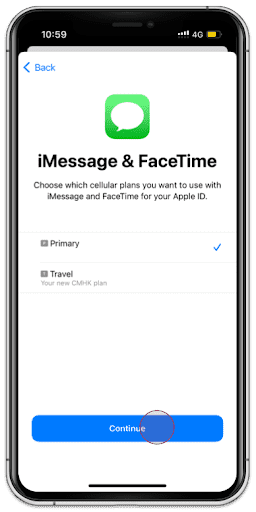
8.
Select Primary and tap [Continue]
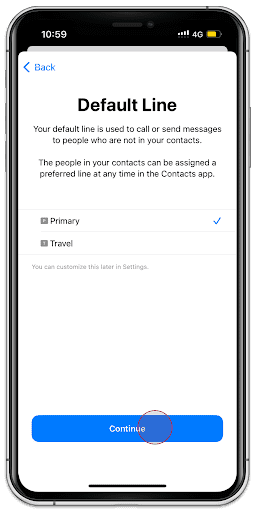
9.
Select Primary and tap [Continue]
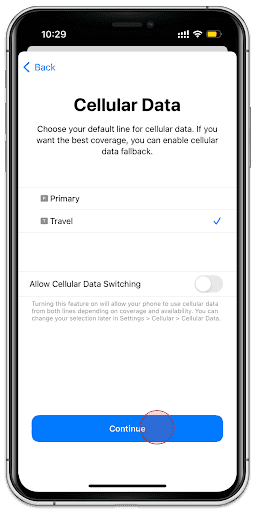
10.
Select Second Choice and tap [Continue]
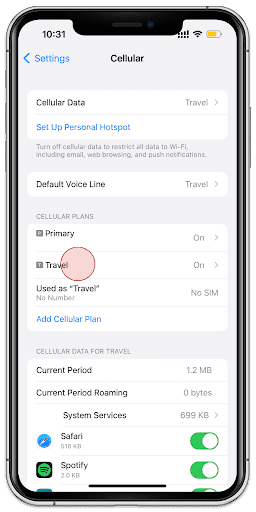
11.
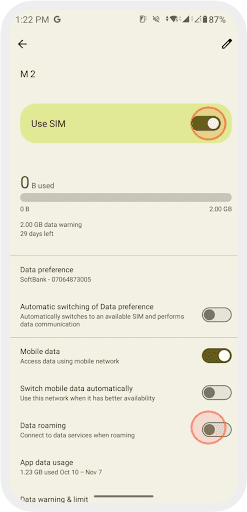
Tap the eSIM you added

12.
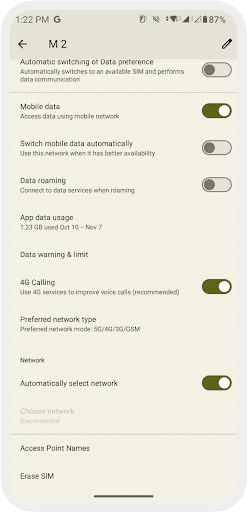
Turn on [Data Roaming]
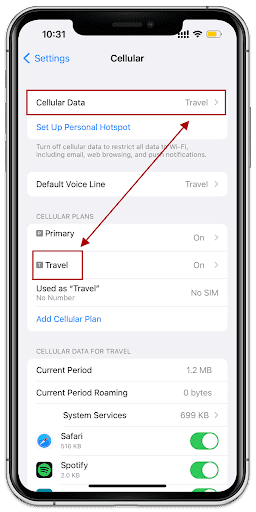
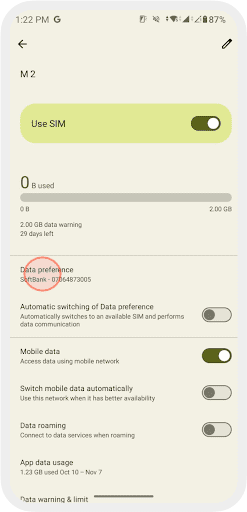
13.
Make sure those are corresponding
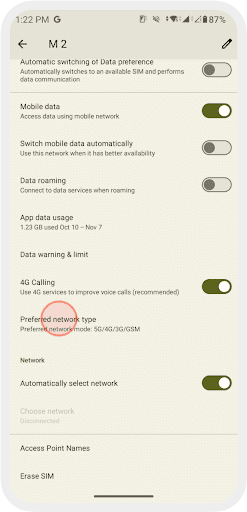
14.
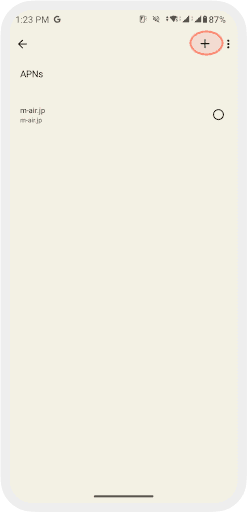
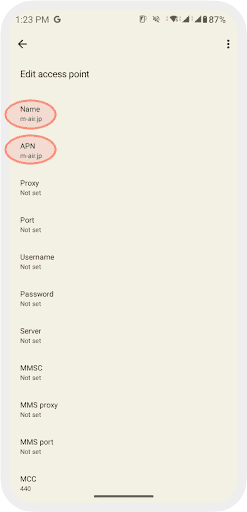
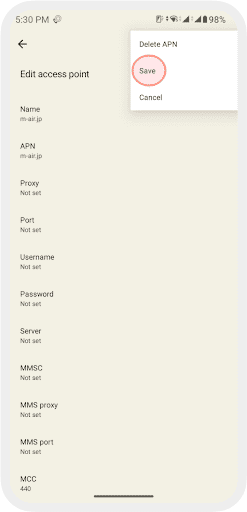
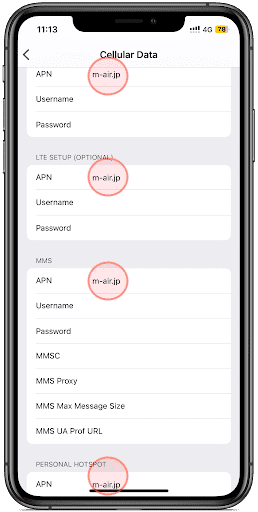
Under [Cellular Data Network] add the APN: m-air.jp/ jpsim.net as shown above 5G eSIM does not require this step

That's all for eSIM settings!