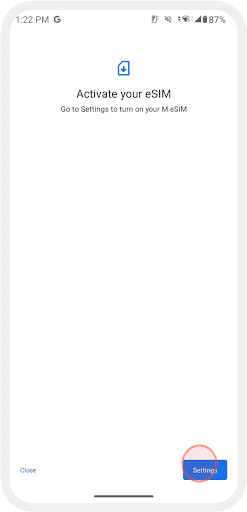
eSIM 설정 방법
Japan Wireless eSIM IOS 및 Android 설정 가이드
간단한 단계를 따라 iPhone 또는 Android에서 Japan Wireless eSIM을 설정하는 방법을 배워보세요. 기기가 eSIM과 호환되는지 확인하고 QR 코드를 스캔하여 몇 분 만에 요금제를 활성화하세요. 물리적 SIM 카드 없이 현지 모바일 연결을 즐기세요.

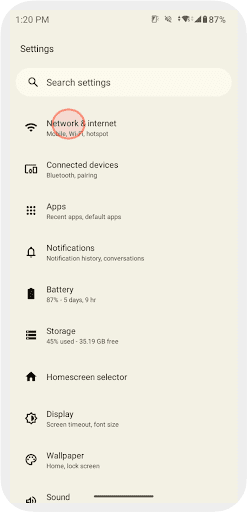
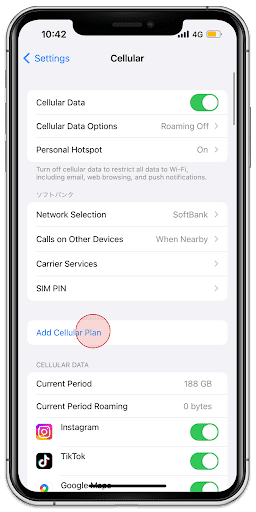
1.
Go to [Settings] and tap [Cellular]
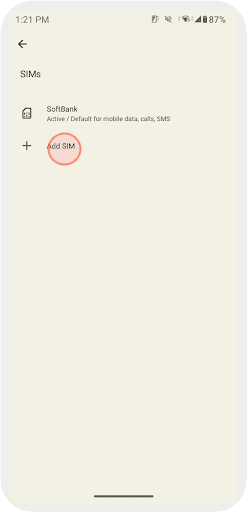
2.
Tap [Add Cellular Plan]
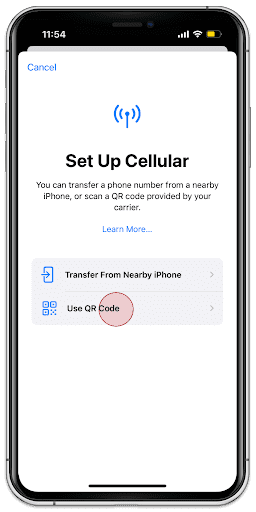
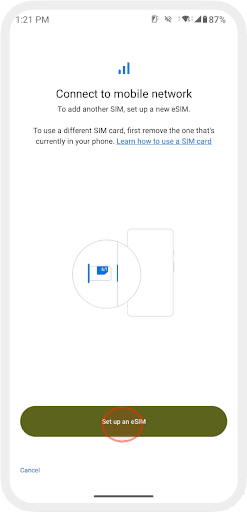
3.
Tap [Use QR Code]
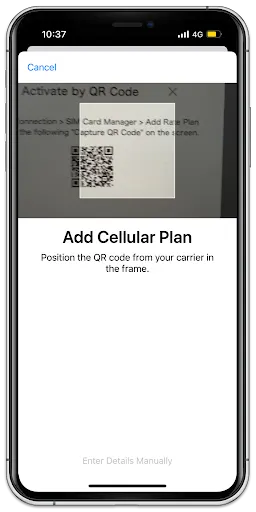
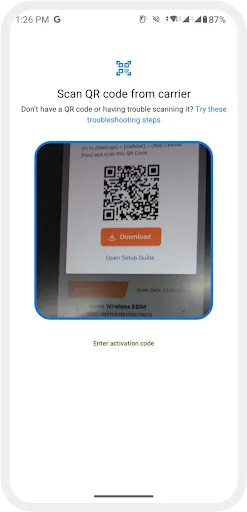
4.
Scan your QR Code of your order
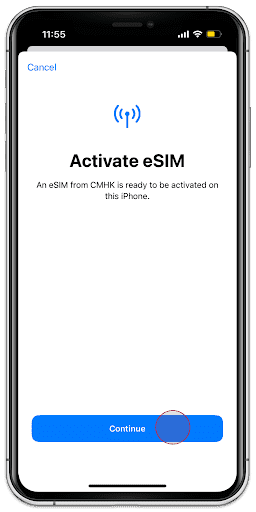
5.
Tap [Continue]
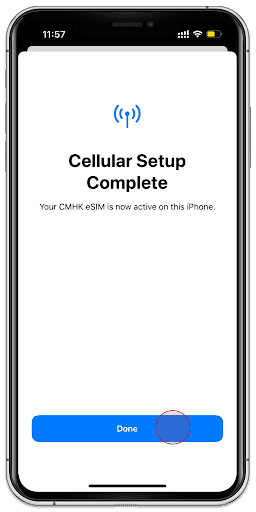
6.
Tap [Done]
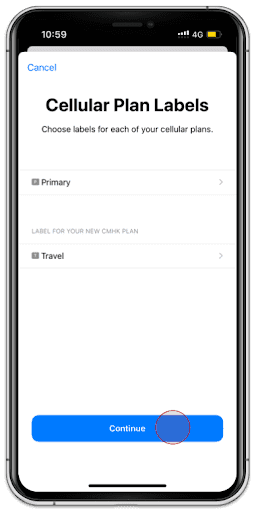
7.
Tap [Continue]
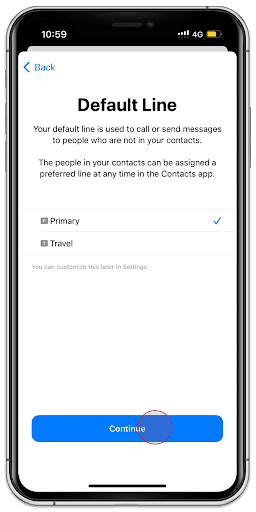
8.
Select Primary and tap [Continue]

9.
Select Primary and tap [Continue]
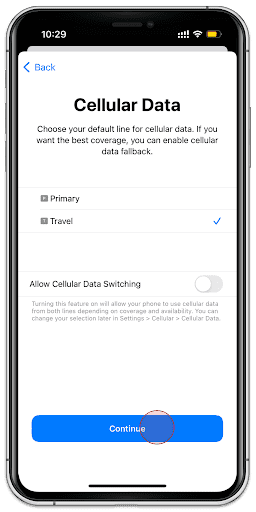
10.
Select Second Choice and tap [Continue]
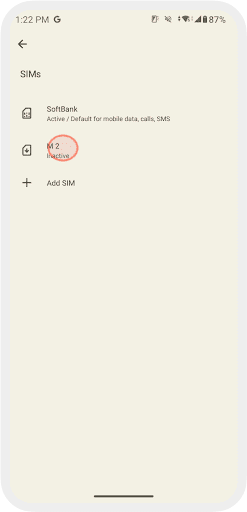
11.
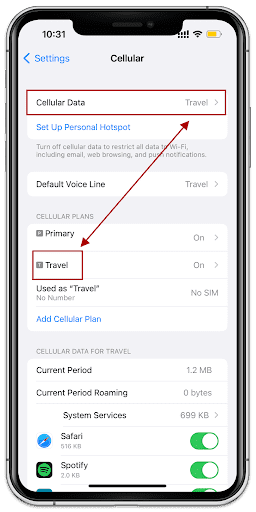
Tap the eSIM you added
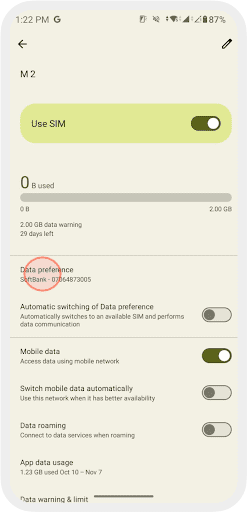
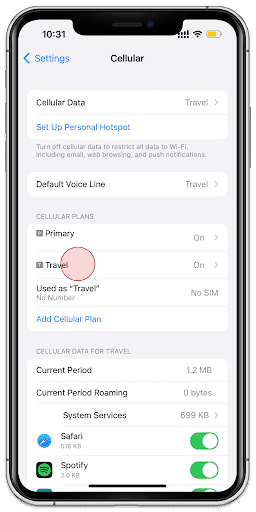
12.
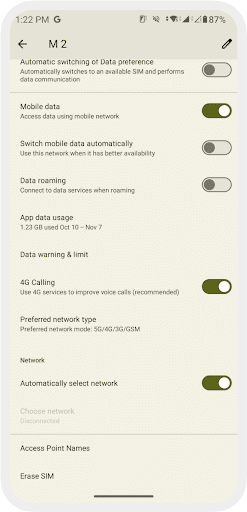
Turn on [Data Roaming]
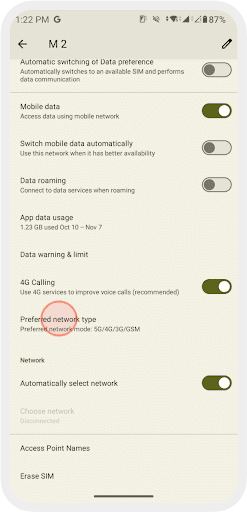
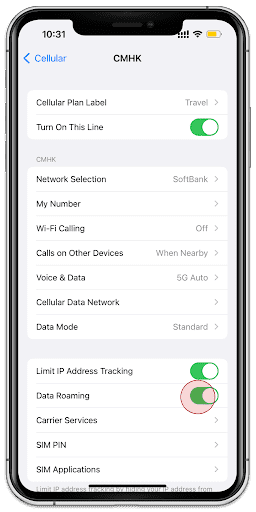
13.
Make sure those are corresponding

14.
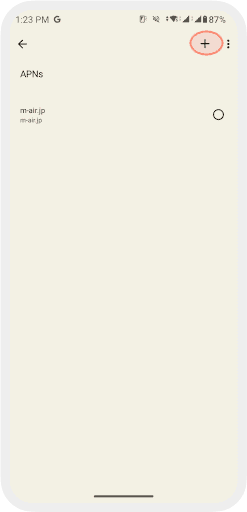
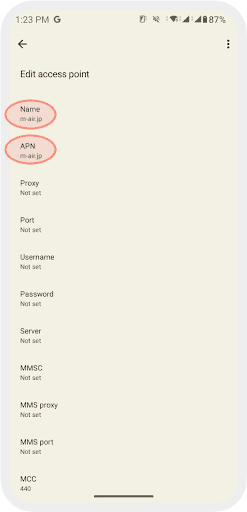
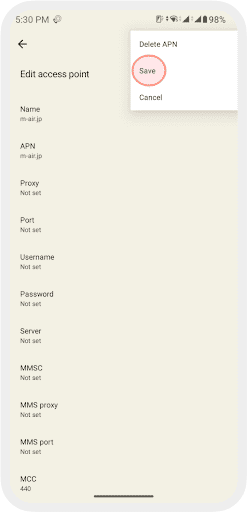
Under [Cellular Data Network] add the APN: m-air.jp/ jpsim.net as shown above 5G eSIM does not require this step

That's all for eSIM settings!