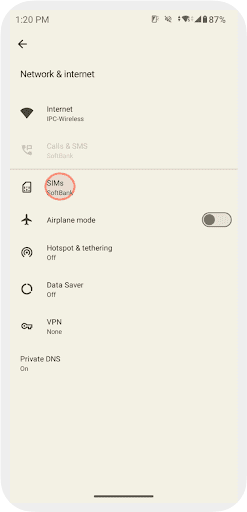
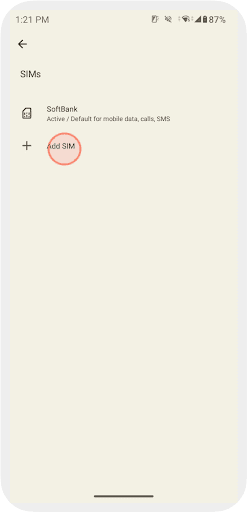
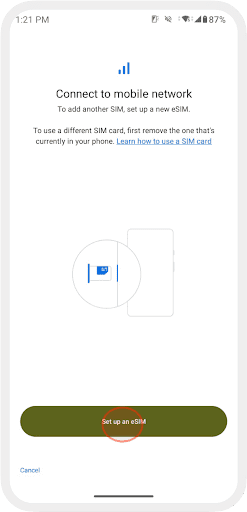
設置您的eSIM
Japan Wireless eSIM IOS 和 Android 設置指南
按照這些簡單的步驟,了解如何在 iPhone 或 Android 設置 Japan Wireless eSIM。確保您的設備兼容 eSIM,掃描您的 QR 碼,並在幾分鐘內激活您的計劃。享受無需實體 SIM 卡的本地移動連接。

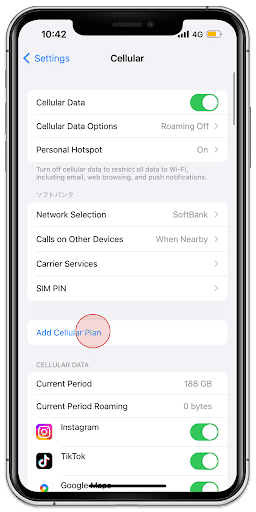
1.
Go to [Settings] and tap [Cellular]
2.
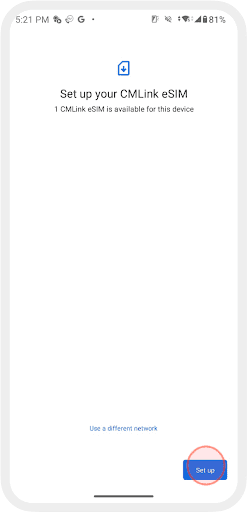
Tap [Add Cellular Plan]
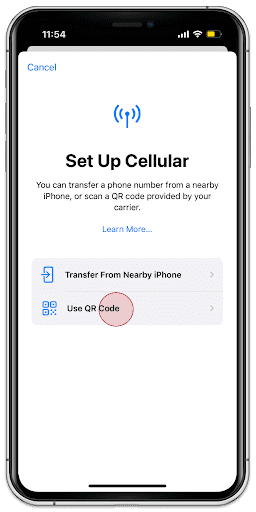
3.
Tap [Use QR Code]
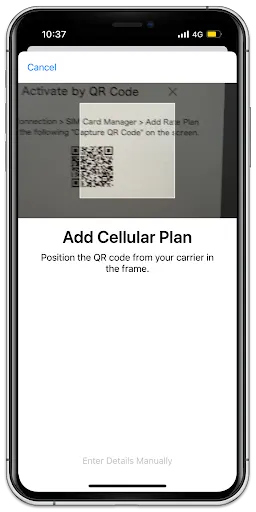
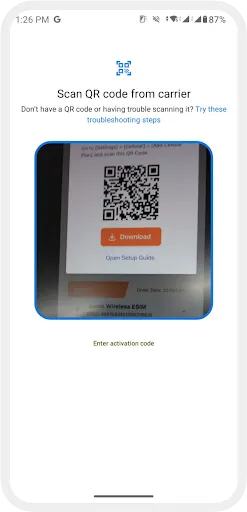
4.
Scan your QR Code of your order
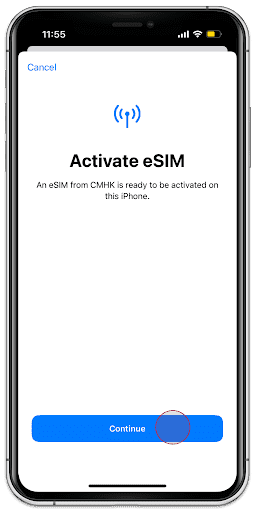
5.
Tap [Continue]
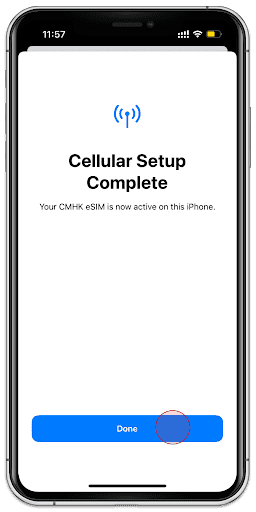
6.
Tap [Done]
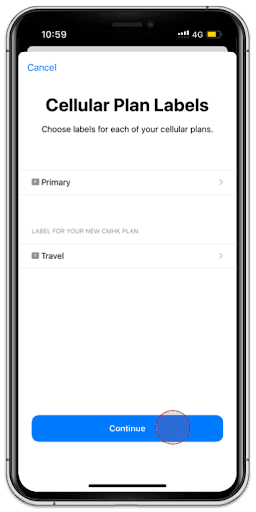
7.
Tap [Continue]
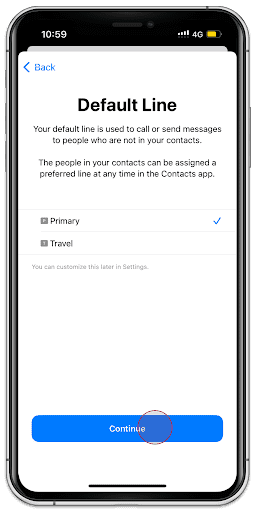
8.
Select Primary and tap [Continue]
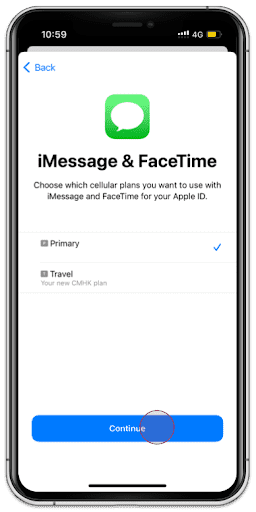
9.
Select Primary and tap [Continue]
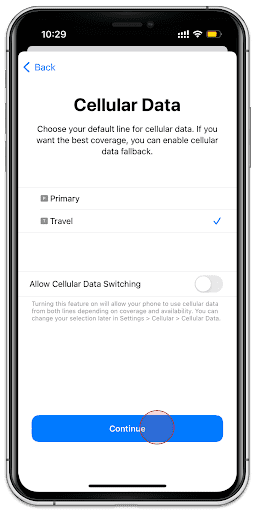
10.
Select Second Choice and tap [Continue]
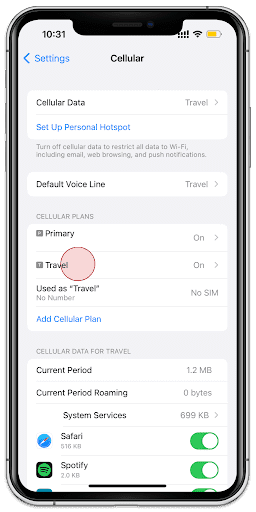
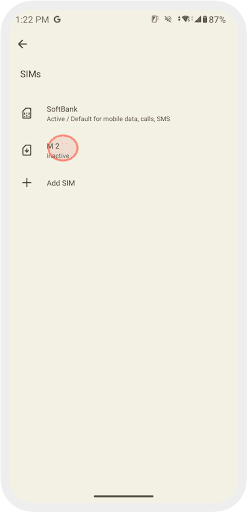
11.
Tap the eSIM you added
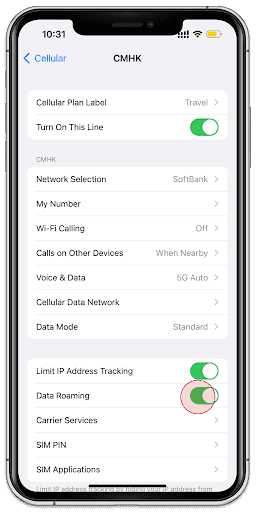
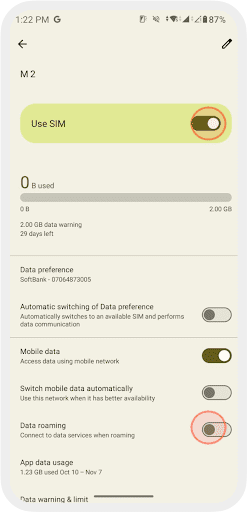
12.
Turn on [Data Roaming]
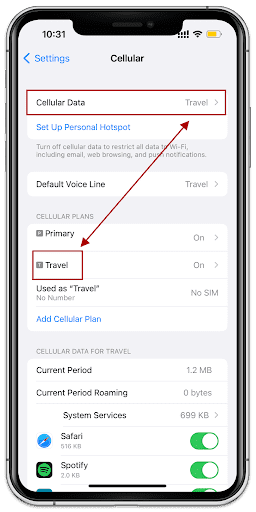
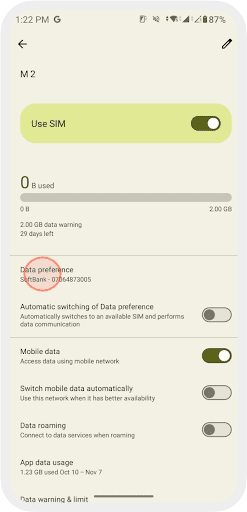
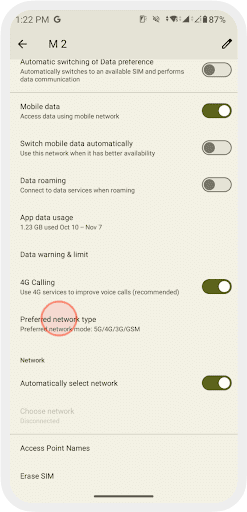
13.
Make sure those are corresponding
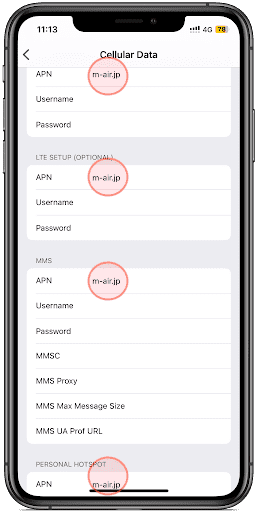
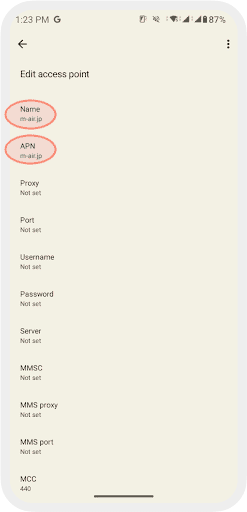
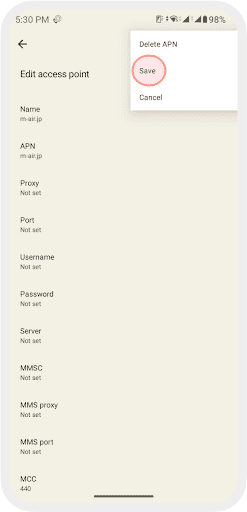
14.
Under [Cellular Data Network] add the APN: m-air.jp/ jpsim.net as shown above 5G eSIM does not require this step

That's all for eSIM settings!